
Hi guys! Dillon here. I hope you enjoyed my last piece, Ionia: The Blood Moon. If you haven’t seen the video already, click here for the original.
Here I’ll be talking about the step by step process as to how I made the video. So let’s begin with the modeling process.
CHARACTERS
The moment I knew I wanted to make a League of Legends animation, I also knew that I wanted Akali to be in it. She’s my main, so it was only fair to pay tribute. As such, before I had even had everything conceptualized, I began work on Akali’s model and rig.

The base human model was downloaded and edited to fit her body type. The face was the most heavily sculpted, since it was important to me that she resembled the character. I based her model off of the original splash art for Blood Moon Akali, as well as several pieces of fan art and cosplayers around the internet.


(http://norfrosch.deviantart.com/)
Texturing was fairly simple with Cycles’ shader node setup. For the face, I actually borrowed Sintel’s texture file and edited it to suite Akali’s skin tone (Sintel is an open movie by the Blender Foundation). I also UV unwrapped Akali’s face to match the layout of the skin. Notably, I had to make Akali’s texture files for her robe and weapon. But for everyone else, I used pretty much all procedural textures. The kama (her weapon) was textured with a custom bump map texture that I created.

(Kama bump map texture. I made it as a polygon in Blender with a black material because I suck at Photoshop)
The biggest headache with Akali was probably her ponytail. Because it was tied in two different spots, the middle part of the ponytail did not behave like hair, but rather like cloth–as a single unit. As such, I had to run the hair simulation only at the end part of the ponytail and her bangs. But the middle part required its own rig and simulation.
What I ended up doing was something rather complicated. I
1. ran a cloth simulation on a basic polygonal line segment,
2. parented empties to each vertex of that polygon (of which there were 5-6),
3. Parented a spline curve to the aforementioned emtpies,
4. Had a mesh textured like hair to follow the curve’s deformations.
And voila. Self-animating ponytail thing.
I then took to Master Yi, which only took about three days, since his face was mostly covered.


(http://nicotaku.deviantart.com/)
Yi’s skin concept was actually inspired by the original concept art by Nicotaku on deviantart.
The last character to make was the Noxian soldier. As such a champion does not actually exist, I based a lot of his appearance on Swain, who is his commander. I reused the base model that I used for Master Yi, adding clothes/armor and simplifying the head.


(Draven in Noxian garb, http://mikkynga.deviantart.com/)

(Official Riot Concept Art)
ENVIRONMENT
Once I had him rigged, as well, I began searching for the right environment for them to fight in. I looked for inspiration of both outdoor and indoor fighting environments, but I ultimately decided that indoors lighting would be easier to control. There were a few concepts that I played with, and found a lot of inspiration from previous concept art, as well as some concept art from Riot’s official Ionia artwork.

(Official Riot concept art)

(Official Riot concept art)
 (http://williamburns.blogspot.com/2012_01_01_archive.html)
And after a little bit of modeling, I ended up with this environment you see here.

I should note, however, that for most of the animation process, I didn’t actually have the environment completely realized yet. As I was working, the moment I had the basic skeleton done, I used it immediately to go into animation as soon as possible, since that’s where I typically got the most momentum from. From there, I began cranking out playblasts of the choreography.
ANIMATION

(NOTE: the environment in the background is still not fully fleshed out)
This was the first project that I’ve worked with where I rendered playblasts out during production. And comparatively, I think it helped my workflow a lot. This rough draft served as a very good drawing board for choreography planning, as well as camerawork. Being able to see everything put together before you spend hours on rendering is pretty important, I decided. And how I managed before without doing so kind of boggles my mind.
The animation process is pretty straightforward. I typically would choreograph as I went a long (which is a process I’m still experimenting with). One thing, however, is that choreography such as this doesn’t always have reference footage readily available and relevant to you. So often times
I had to record myself doing certain parts of the choreography, and then reference my own movements in my animation (refined of course).
After key animation and choreography was done, I went back to refine the environment to become the final product that you see in the video.
STORYBOARDING
It might seem strange that I waited so long before the storyboarding process. But at this point, I already had all of the fighting finished. However, there were still several points before, in between and after that I had not yet animated. This was because it was typically for narrative scenes such as this that I needed a storyboard. I ended up storyboarding the three sequences, each of which I had dubbed respectively: Before the Storm, Eye of the Storm, and Aftermath.

(Ionia: The Blood Moon, Storyboard1)

(Ionia: The Blood Moon, Storyboard2)

(Ionia: The Blood Moon, Storyboard3)

(Ionia: The Blood Moon, Storyboard4)
I then followed my storyboards to completion. This involved the typical animation and camera work. But it also involved creating the minions, which I had not previously planned.

(Ionia: The Blood Moon, Minion is Speared)
The minions were crucial for the beginning and middle parts of the video. However, at this point, I was getting fatigued from all the work I had already put in. So I simply downloaded a very simplistic base model and edited its texture. I modeled very simple outfits for each color of minion, and then plopped them all in there. It was important that I used a low poly model for the minions, since they were to be so high in count.
SMOKE SIMULATION
After everything was laid out, and all of the major animation realized to a point, I began working on special effects. This included–for the most part–particle effects. Some simple particle effects were added to the environment as dust particles floating in the air, which gave the scene more atmosphere to it. But more important were all of the smoke simulations. There were smoke simulations scattered throughout the video as a cool effect, but there are some particular scenes where it was absolutely necessary. Akali’s shroud, Master Yi’s Wuju Style, and Akali breaking down the pillar.
(Ionia: The Blood Moon, Twilight Shroud)

(Ionia: The Blood Moon, Wuju Style)

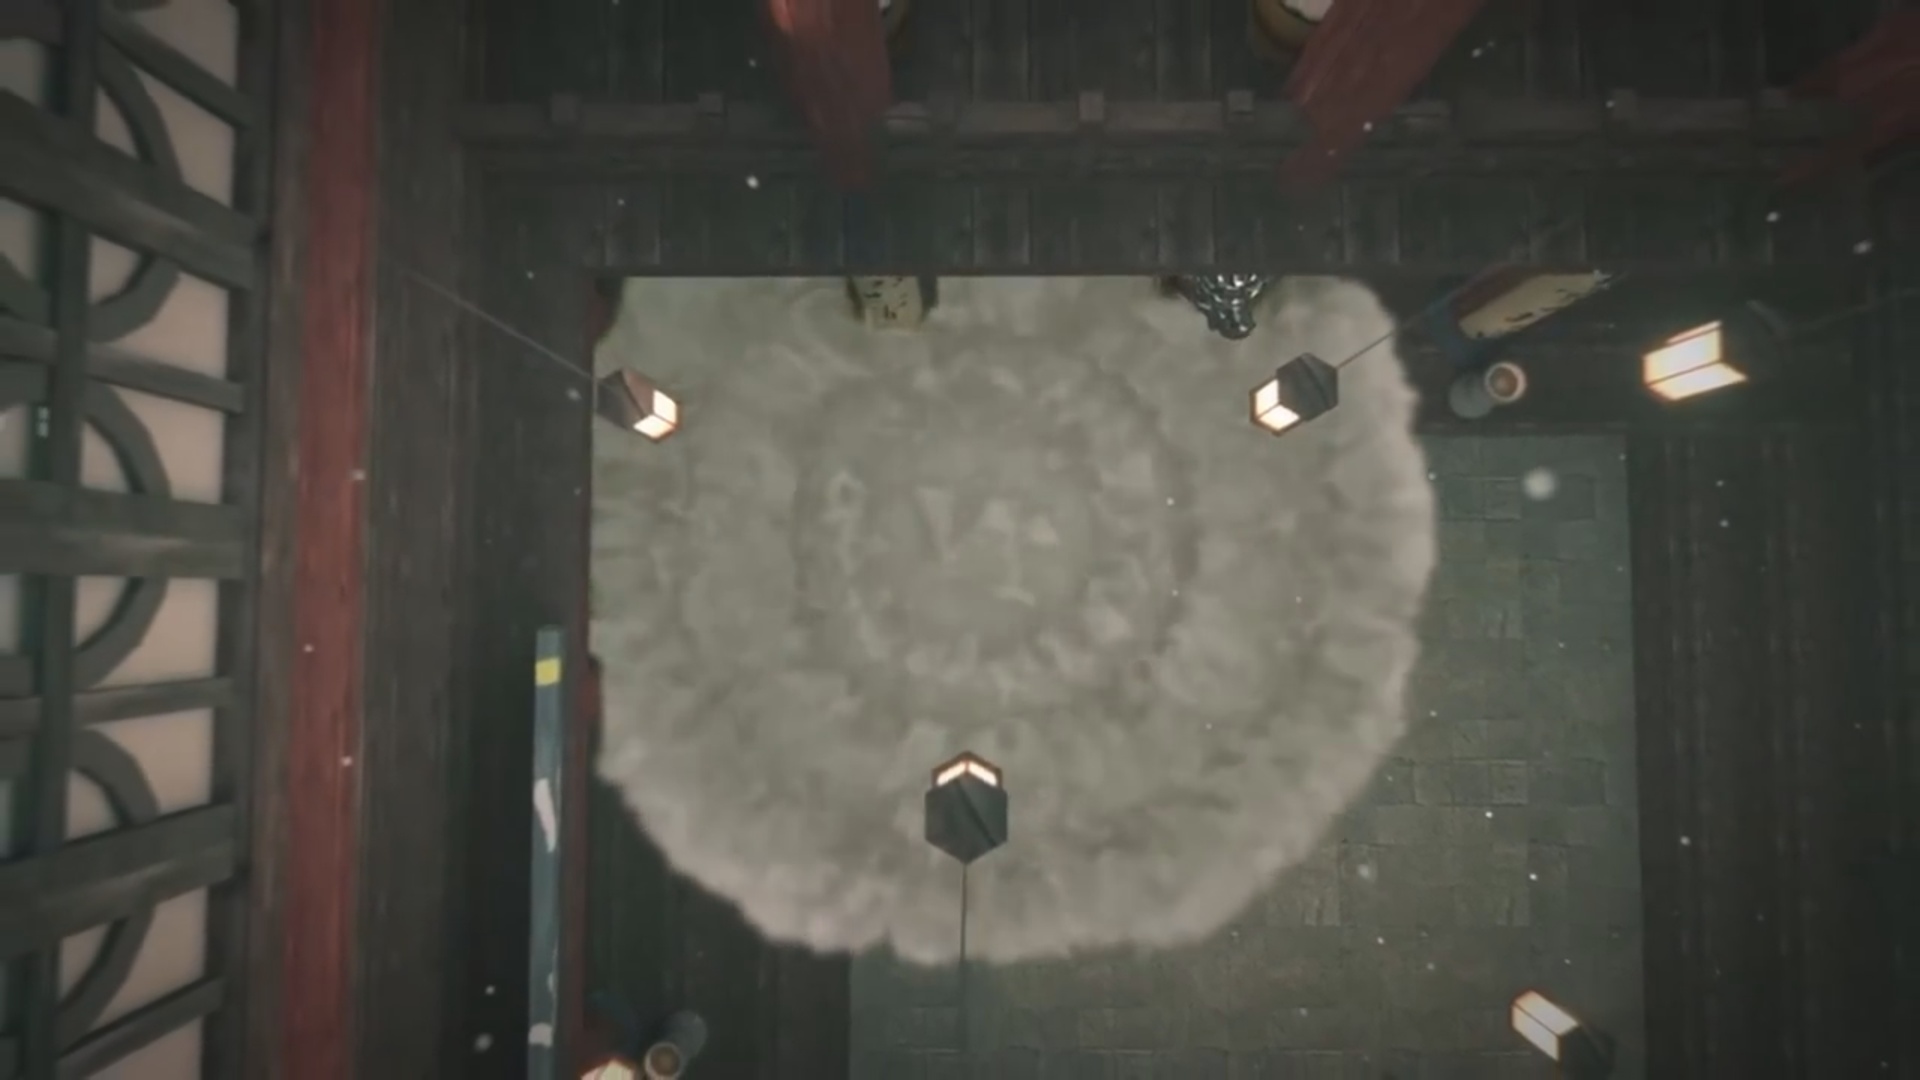
(Ionia: The Blood Moon, Pillar Smoke)
The smoke simulator I used was native to Blender. For those of you familiar with Blender, you’ll know that Blender has two different inherent render engines: Cycles and Blender Internal.

(http://cgcookie.com/blender/images/blender-internal-vs-cycles/)
Cycles is a more photo-realistic render engine, very similar to Mental Ray and LuxRender in quality and algorithmic similarity. And due to this superiority in image quality, I chose to do this project in Cycles. However, Cycles in its current development does not yet have volumetric lighting implemented.
Blender Internal, on the other hand, has had volumetric lighting for a while. Therefore, in order to have smoke simulations work in tandem with a Cycles rendered animation, I had to composite all of the smoke simulations in post.

(my node setup for compositing the two different render engines together)
This wasn’t too hard to do since Blender allows for multiple scene setups, thus preserving the lighting setup from one scene to another. To get an idea of how actually simulating the smoke went, I’ll describe the process I went through in making the pillar fall.

The pillar was my favorite scene to do since it was so powerful, and the smoke was ultimately what made it look good. One of the biggest jobs of the smoke in this scene in particular was to cover up the shoddy break points I had “modeled” in. They were essentially straight lines that I had cut into the pillar. The pillar was hand animated to fall, no physics or shatter simulations needed.

(ANIMATED; Ionia: The Blood Moon, playblast_pillar_no_smoke)
Now, in order to make the smoke look convincing, I had two different layers of smoke for each break point in the pillar.
1. One layer of smoke consisted of a cloud of dust–amorphous and impartial to gravity.

2. The second layer consisted of both a smoke sim and a particle emitter. I had the particle emitter emit wood chips that would have broken off from the pillar during the impact, and then combined it with a smoke trail, making the chips more visible, as well as adding some flavor to the impact.

3. But I kept another particle emitter that didn’t have smoke trails to make sure the audience still knew the wood chips were there.

Once all of the smoke simulations were done, I had to begin thinking about rendering.
RENDERING
At this point, each frame of my animation took about an average of 10-15 minutes. At this rate, one computer might take about 60 days to complete if it were a completely efficient process. Which of course it never is. So a good habit to get into is to at least double the time needed to get a good estimate.
However, 120 days for one animation was simply way too long for me to wait. Plus I still had to use my computer during the day time. So I did what any animator would do in this situation: I bought and built two new computers.

(Computer 1, code name: Lelouch)

(Computer 2, code name: Rolo)
Specs: AMD Octo-core + 500 MB hard drive + micro-ATX motherboard + 350W power supply + $20 case with fans = about $500 for each computer
With my two new computers, as well as my old work station, I had a total of 4 computers rendering for me. But I wasn’t done setting everything up just yet.
LIGHTING
The next step was lighting. Lighting was so very important, and I might have just realized that too late. Most of my lighting was based off of the standard three point setup: key light, fill light, and back light.

(Standard 3-point Lighting Setup)
The great thing about lighting in 3D environments is that you don’t have to worry about the light source being in the frame. It’s so very simple to make lights invisible, and thus eliminating the problem and liberating your creativity. Gradually, after I got a hang of what looked good and natural, my workflow became something like: Light up and set up a scene, send to an appropriate computer, render, light up and set up a scene, send to an appropriate computer, render, etc.
And the process ended up taking about two months.
MUSIC
The most unique thing about this project compared to my past works is that I had the opportunity to work with a composer to make an original score for this piece. And who better to work with than J. Benjamin Scott (Vedrim), the composer of the original “Ionia” fan composition? His music has always captivated my mind as immersive pieces of art. As such, I contacted him and asked him if he was willing to help me out. Along with asking him, I also attached my past videos to show him what I was capable of, just so that there was no blind trust necessary in the negotiation process. And he agreed!

(Scott’s YouTube Channel – “Vedrim”)
Working with Scott was great. He and I worked closely to determine the different atmospheres of each audiovisual phrase. And when we were done, we ended up with four original pieces catered to the video. And I loved all of them.
SOUND
I added this section just so that there is an impression of the process. Sound design is an entirely different beast. And quite frankly the only way I know how to explain how I did it is that I did it. Here’s a picture of 24 out of 40 layers of sound that I used to make this video.

(Layers 21-45 of Ionia: The Blood Moon)
One thing that’s important to note is the reason why there are so many layers. Of course, I feel like I might have overdone it a little bit, but in sound editing/design, it’s usually a good idea to layer different sounds together at once to get the full effect. Any movement or interaction in a scene is almost never just one thing making sound. And as such, you have to break down in your head exactly what is producing the sound in each action and recreate it.
For example, going back to the pillar scene: during the crash of the pillar, I had the basic wood cracking noise. But I also had low frequency swishes and rumbling noises to make it sound more powerful. I also added some faster, higher frequency swishes for the smoke, and for Akali flying through the air. I also added an explosion noise to make it seem more powerful. And on top of that, I had cloth moving around for the banner and for Akali’s robes.
It sounds much too empty with just a wood cracking sound effect. In an isolated environment where the sound was recorded, maybe that’s how it would sound. But because your environment is usually not isolated, it is very important to layer sound together to make them sound great.
And finally, after five entire months of work, I finished Ionia: The Blood Moon.

And that’s it! I finished the film and took a nap.
Hope you enjoyed this look behind the curtain!
Dillon Gu
